[et_pb_section bb_built=”1″ admin_label=”section”][et_pb_row admin_label=”row”][et_pb_column type=”1_4″][et_pb_text admin_label=”Text” background_layout=”light” text_orientation=”left” use_border_color=”off” border_color=”#ffffff” border_style=”solid”]
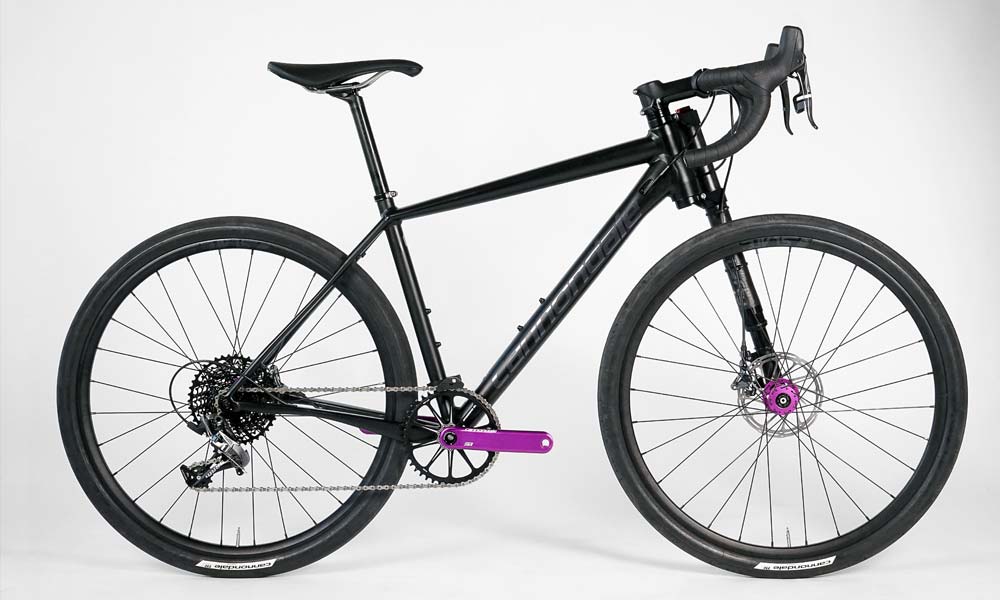
One of the quirkier bikes to pass through the workshop over the years, the Cannondale Slate is a great piece of cycling equipment. Here is the appraisal from the mechanic…
Comments from Cam Harrison of The Rolling Fix.
[/et_pb_text][/et_pb_column][et_pb_column type=”3_4″][et_pb_text admin_label=”Text” background_layout=”light” text_orientation=”left” use_border_color=”off” border_color=”#ffffff” border_style=”solid”]
It’s fun to work on such an interesting road bike. We see a lot of little quirks here and there but the Slate is entirely different. What makes it more enjoyable is that it all came together with ease.
Surely a basic build is of value to everyone: the customer (who can do some maintenance themselves), the bike shop (which doesn’t have to invest hours of time in putting it together), and the company itself – as it doesn’t get frowned upon in aftermarket frustration.
For all the innovation that exists, there’s nothing too complex about putting the Slate together.
We dismantled it and weighed all the parts but the Lefty fork was largely left intact and considered one item. If we opted to strip that back then we’d see some complexity; there’s a lot of fiddly little parts in the suspension system but as a unit it came off the bike with a bit of mallet work… and slotted back together without any fuss.
[/et_pb_text][/et_pb_column][/et_pb_row][et_pb_row admin_label=”Row”][et_pb_column type=”4_4″][et_pb_image admin_label=”Image” show_in_lightbox=”off” url_new_window=”off” use_overlay=”off” animation=”left” sticky=”off” align=”left” force_fullwidth=”off” always_center_on_mobile=”on” use_border_color=”off” border_color=”#ffffff” border_style=”solid” src=”https://www.ridemedia.com.au/wp-content/uploads/2017/08/DSC03176.jpg” /][/et_pb_column][/et_pb_row][et_pb_row admin_label=”Row”][et_pb_column type=”4_4″][et_pb_gallery admin_label=”Gallery” gallery_ids=”33911,33910,33912,33913″ fullwidth=”off” orientation=”landscape” show_title_and_caption=”off” show_pagination=”off” background_layout=”light” auto=”off” hover_overlay_color=”rgba(255,255,255,0.9)” use_border_color=”off” border_color=”#ffffff” border_style=”solid” /][/et_pb_column][/et_pb_row][et_pb_row admin_label=”Row”][et_pb_column type=”1_4″][et_pb_text admin_label=”Text” background_layout=”light” text_orientation=”left” use_border_color=”off” border_color=”#ffffff” border_style=”solid”]
With one chainring there’s no need for the complications of a front derailleur…
[/et_pb_text][/et_pb_column][et_pb_column type=”3_4″][et_pb_text admin_label=”Text” background_layout=”light” text_orientation=”left” use_border_color=”off” border_color=”#ffffff” border_style=”solid”]
Working the cables
The headset area took a little bit of manipulation. It’s not standard but aside from that the Slate came together easily.
Running a SRAM Force Hydro 1X groupset with internal routing means it’s fairly standard as far as a modern bike build goes.
There is lots of space at the bottom bracket once I had the plastic guide off and it was easy to run cables through.
It’s actually a really neat design; you just have to rotate and twist the guide into the bottom of the frame – there’s no hard clicking or anything like that. It sits in nice and snug and I think that’s really neat.
I could feed it all onto the cables beforehand and then just pop it all in afterwards with no kinking of the cable.
There is a nice wide opening at the cable entry points with the built-in housing grommets as well. I could go around the outside and just slot the cable in – it couldn’t have been more simple.
[/et_pb_text][/et_pb_column][/et_pb_row][et_pb_row admin_label=”Row”][et_pb_column type=”4_4″][et_pb_image admin_label=”Image” show_in_lightbox=”off” url_new_window=”off” use_overlay=”off” animation=”left” sticky=”off” align=”left” force_fullwidth=”off” always_center_on_mobile=”on” use_border_color=”off” border_color=”#ffffff” border_style=”solid” src=”https://www.ridemedia.com.au/wp-content/uploads/2017/08/G0063593.jpg” /][/et_pb_column][/et_pb_row][et_pb_row admin_label=”Row”][et_pb_column type=”4_4″][et_pb_gallery admin_label=”Gallery” gallery_ids=”33916,33917,33918,33919″ fullwidth=”off” orientation=”landscape” show_title_and_caption=”off” show_pagination=”off” background_layout=”light” auto=”off” hover_overlay_color=”rgba(255,255,255,0.9)” use_border_color=”off” border_color=”#ffffff” border_style=”solid” /][/et_pb_column][/et_pb_row][et_pb_row admin_label=”Row”][et_pb_column type=”1_4″][et_pb_text admin_label=”Text” background_layout=”light” text_orientation=”left” use_border_color=”off” border_color=”#ffffff” border_style=”solid”]
See the unboxing… click the YouTube link.
[/et_pb_text][/et_pb_column][et_pb_column type=”3_4″][et_pb_video admin_label=”Video” src=”https://youtu.be/jDEpXsd7EsM” /][/et_pb_column][/et_pb_row][et_pb_row admin_label=”Row”][et_pb_column type=”1_4″][et_pb_text admin_label=”Text” background_layout=”light” text_orientation=”left” use_border_color=”off” border_color=”#ffffff” border_style=”solid”]
The bike as you see it on these pages retails in Australia for $5,899.
[/et_pb_text][/et_pb_column][et_pb_column type=”3_4″][et_pb_text admin_label=”Text” background_layout=”light” text_orientation=”left” use_border_color=”off” border_color=”#ffffff” border_style=”solid”]
Suspension… on a ‘road’ bike
There have been hundreds of bikes on test in this magazine over the years but, aside from a couple of mountain bikes in the early years, and the overview of the Specialized Roubaix (RIDE #73) this is the only one we’ve had with suspension.
I haven’t worked on the internals of many Lefty forks in the past; but I have serviced plenty of bikes with the system on it.
The good news is, they seem to be quite resilient; it’s a good sign that I’ve never been asked to service the fork.
The shock relies on air pressure and adjustment is simple, via a Schrader valve. It’s possible to vary the rebound effect with a twist of the button at the top of the fork.
The lock-out system is within easy reach and simple to activate.
Again, putting the bike together was easier than pulling it apart. Without the need to dismantle it would have been in the studio within minutes of opening the very neat box.
I think the biggest battle I had was with the steering tube – the head tube, I suppose, as the Lefty fork is not actually attached like normal road bikes.
There are fully pressed in bearings so there’s no taper whatsoever in the headset so the steering tube is pressed and the tolerances are really tight.
Getting it out was a bit of a challenge but once I had it set up right, it was fine. It’s definitely not something you’d want to do on a regular basis. A quick twist of the handlebars is going to be your ‘headset check’; if there is grinding or noise then the mechanic is likely to just bash the whole thing out and replace the bearings.
They wouldn’t pop the fork off to have a look like you could on a standard road bike.
[/et_pb_text][/et_pb_column][/et_pb_row][et_pb_row admin_label=”Row”][et_pb_column type=”4_4″][et_pb_image admin_label=”Image” show_in_lightbox=”off” url_new_window=”off” use_overlay=”off” animation=”left” sticky=”off” align=”left” force_fullwidth=”off” always_center_on_mobile=”on” use_border_color=”off” border_color=”#ffffff” border_style=”solid” src=”https://www.ridemedia.com.au/wp-content/uploads/2017/08/Cannondale-Slate-Detail-33.jpg” /][/et_pb_column][/et_pb_row][et_pb_row admin_label=”Row”][et_pb_column type=”4_4″][et_pb_gallery admin_label=”Gallery” gallery_ids=”33922,33923,33924,33925″ fullwidth=”off” orientation=”landscape” show_title_and_caption=”off” show_pagination=”off” background_layout=”light” auto=”off” hover_overlay_color=”rgba(255,255,255,0.9)” use_border_color=”off” border_color=”#ffffff” border_style=”solid” /][/et_pb_column][/et_pb_row][et_pb_row admin_label=”Row”][et_pb_column type=”1_4″][et_pb_text admin_label=”Text” background_layout=”light” text_orientation=”left” use_border_color=”off” border_color=”#ffffff” border_style=”solid”]
The Lefty fork is a major feature of the bike but it’s not the only thing to make the Slate something special…
[/et_pb_text][/et_pb_column][et_pb_column type=”3_4″][et_pb_text admin_label=”Text” background_layout=”light” text_orientation=”left” use_border_color=”off” border_color=”#ffffff” border_style=”solid”]
Working with an aluminium frame
The build process was all really simple. There is a one-piece 10-42 cassette but it just screws on easily. It’s similar to a MTB freehub – ie. super simple. The 1X chainring and the Cannondale Hollowgram crank go together really well.
This bike has press-fit BB30 bearings so it fits straight into the frame and as long as you have the spacers right and the wave washer set up, it’s a simple process.
The alloy frame means you’ve got to make sure you lube it well at the obvious points and put anti-seize on a few nuts and bolts, but apart from that it’s a no-fuss construction.
I think Cannondale – and the proprietary items, like the drop-out of the fork – is a very clever company.
For the front wheel, it’s a slotted arrangement so you only have to do about one and a half turns of the brake bolt and the whole thing pops off.
It’s really simple if you have to take the front wheel on and off, but really that’s only for travel because you can change a tyre with the wheel still on.
The Slate did have a slightly bent derailleur hanger once we put the bike back together after weighing.
Due to the shape of the hanger, a standard straightening tool didn’t screw into the frame because it’s got quite a big curve on it. You need a narrower head or an adapter from Park Tool. I found a solution so all the gears are shifting smoothly.
[/et_pb_text][/et_pb_column][/et_pb_row][et_pb_row admin_label=”Row”][et_pb_column type=”4_4″][et_pb_image admin_label=”Image” src=”https://www.ridemedia.com.au/wp-content/uploads/2017/08/Cannondale-Slate-Detail-02.jpg” show_in_lightbox=”off” url_new_window=”off” use_overlay=”off” animation=”left” sticky=”off” align=”left” force_fullwidth=”off” always_center_on_mobile=”on” use_border_color=”off” border_color=”#ffffff” border_style=”solid” /][/et_pb_column][/et_pb_row][et_pb_row admin_label=”Row”][et_pb_column type=”1_4″][et_pb_text admin_label=”Text” background_layout=”light” text_orientation=”left” use_border_color=”off” border_color=”#ffffff” border_style=”solid”]
For more comments about bikes that have gone through the workshop over the years, see the ‘Build Report’ link at the top of RIDE’s homepage.
[/et_pb_text][/et_pb_column][et_pb_column type=”3_4″][et_pb_text admin_label=”Text” background_layout=”light” text_orientation=”left” use_border_color=”off” border_color=”#ffffff” border_style=”solid”]
Extras: MTB considerations — dropper post?
One thing I might do to change it up a bit and make this a really interesting machine would be to run a lever actuated dropper post from the left shift lever – I’d only do it… well, because the option exists.
It would be nice to set it up in your full road position but then add a dropper post just to get some adjustability if you’re going hard on some single track. It’d be a pretty simple process.
[/et_pb_text][/et_pb_column][/et_pb_row][/et_pb_section]